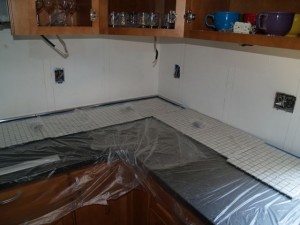
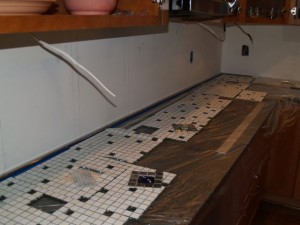
This weekend I tiled the kitchen backsplash, and what a task that was. I used four different types of tiles, which I posted about earlier. I started by covering the countertop with plastic, and then laying out the tile determine how to space accent tile and stainless steel tiles.
I then start cutting out random glass tiles from the mosaic pieces to substitute the stainless steel tiles. I also cut squares of stainless steel tiles which would surround and highlight the accent tiles.
I used glass tile mortar because for the obvious reason that I was using glass tile, and other types of mortars have trouble sticking to glass tile, especially the handmade tile that had no mesh backing. Maybe I am remembering tiling my downstairs bathroom last year through rose-colored glasses, but glass tile mortar seems to harden faster than the normal, pre-mixed mortar I used last year. It took me about nine full hours to layout all the tile, cut out all the glass tiles to substitute in the stainless steel and accent glass tiles, spread the mortar, place the tiles, and also cut tiles where need be. Through a little bit of luck and planning, I was able to minimize the number of tiles I needed to cut. The glass tiles could be cut somewhat easily though tediously with manual scoring tool. I did have to cut a few of the stainless steel edging tiles. I used my Dremel rotary tool with the metal cutting blade. I was going to use the metal cutting blade to cut through the stainless steel exterior, and then switch to the diamond tip tool for the ceramic interior, but it turns out the metal blade can cut through the ceramic fairly well, or at least good enough for what I was doing. By late Saturday night, all the tile was in place.
For the grout, I used epoxy grout. Grout with sand could have scratched the stainless steel, and epoxy grout was recommended for glass. Also, epoxy grout is supposed to be nice for a kitchen since it doesn’t stain the way normal grout can. The problem with epoxy grout is, when they say it cures faster than normal grout, they are not kidding. Seriously, the stuff cures fast. Even placing the bucket in the freezer while cleaning the section I just grouted only helped a little bit. If you use epoxy grout, you really have to work in small sections. Grout a small section, stick the grout in the freezer, then clean the section you just grouted. Clean it with water with dish soap in it, and just plan to use sponges that you will throw away. The epoxy will stick to the sponges and not come out. Also, epoxy grout sticks to your skin, like you wouldn’t believe. The grout I bought actually came with a pair of latex gloves, but I think those are for when you are mixing the two parts. You mix two parts that cause an exothermic (produces heat) reaction, and I guess the gloves are to protect you during that reaction. I don’t know, but I couldn’t wear the gloves the whole time because I was sweating, and I would need to change them. The summary is that epoxy grout is not fun to use, so don’t use it unless you really need it. If you do, I would highly recommend two people: one to grout and one to clean the area that was just grouted.
As a side note, the color grout I used was Delorean gray. I chose that color because I thought it would match the stainless steel the best, and any color gray would compliment the glass tiles nicely. The side benefit is that if I fit the oven with a flux capacitor, I can turn the kitchen into a time machine. Actually the oven is already so high tech, not to mention all digital, that perhaps it already has a flux capacitor. So forget Hot Tub Time Machine, I could have a kitchen time machine which I think would be quite a bit more useful. Burn your roast? Use the kitchen time machine to go back in get the roast out of the oven faster. Have a new recipe, and not sure if you will like it? Go to the future and find out. Actually that might not work. That might be like the kill your grandfather paradox. Still you could go back in time if you forget to add an ingredient or something. It could be quite practical.
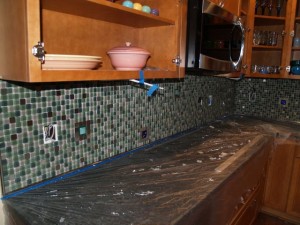
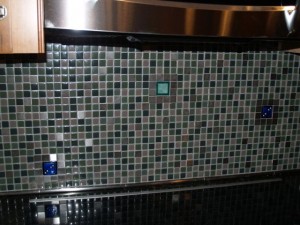
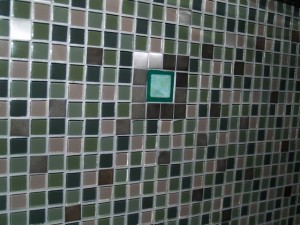
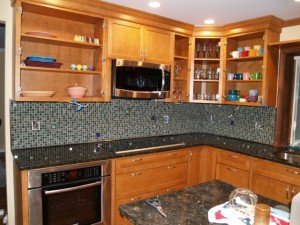
But I digress, here are photos of the finished tiled backsplash. The area behind the cooktop has three different accent tiles, which like all the accent tiles are outlined in stainless steel tiles.
Here is a close up of one of the accent tiles.
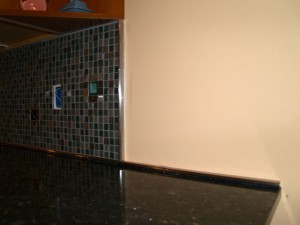
I wasn’t sure what to do with the overhand countertop. I needed to continue the edging tile to cover the gap between granite and the wall, but I didn’t want to continue the field tile out past the upper cabinets. I finally decided to stop the field tile at the end of the cabinets but just continue the edging tile row out to the end of the granite. I think that the best choice.
Finally here is a wide angle photo of the tile in place.

Linda- everything looks great! We are in the market for a fixer-upper home and I know who to ask for advice now! You have done a wonderful job.
Thanks Jen! I’m on my third home renovation, so I’m getting pretty good at it. Feel free to contact me if you need advice.
Pingback: Stainless Steel Tiles and Pets