Blanket + Doorknobs = Window Treatment

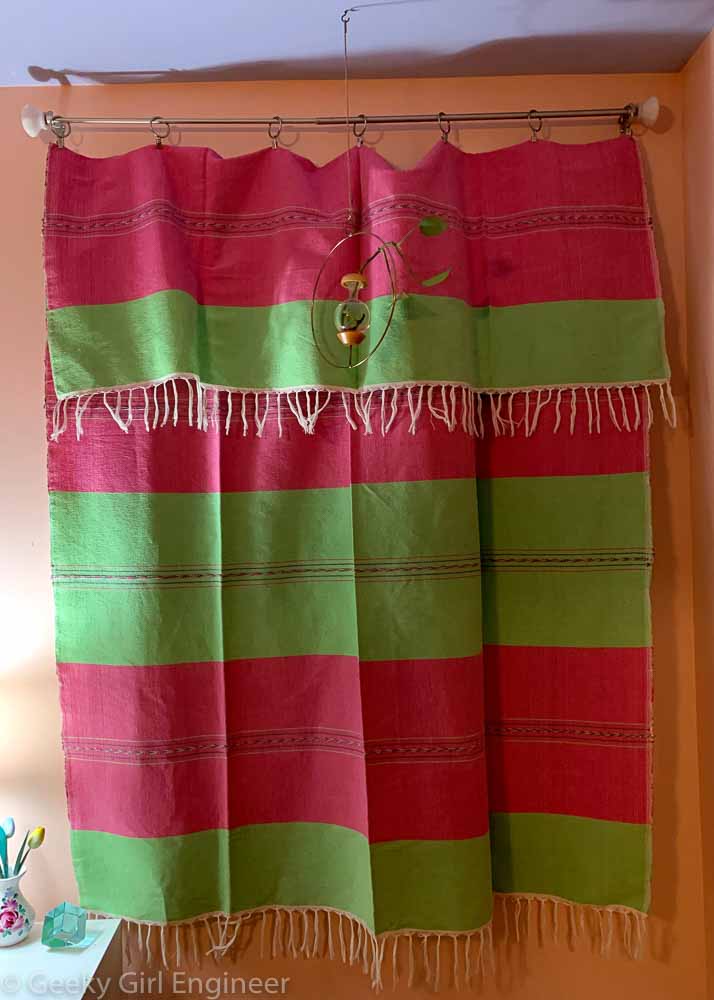
Previously I made a unique window treatment in the form a wooden dowel with antique glass doorknobs glued to the end of it and a shawl or tablecloth. I still am not sure what the textile is meant to be. It could be a tablecloth or shawl or something else entirely. It is very pretty, and I like it. However after having it up for several years now, I decided I needed a change. The textile was too thin for a curtain in that it let too much light in, and I am not completely positive how much privacy it brought. Also it was just barely able to cover the window.

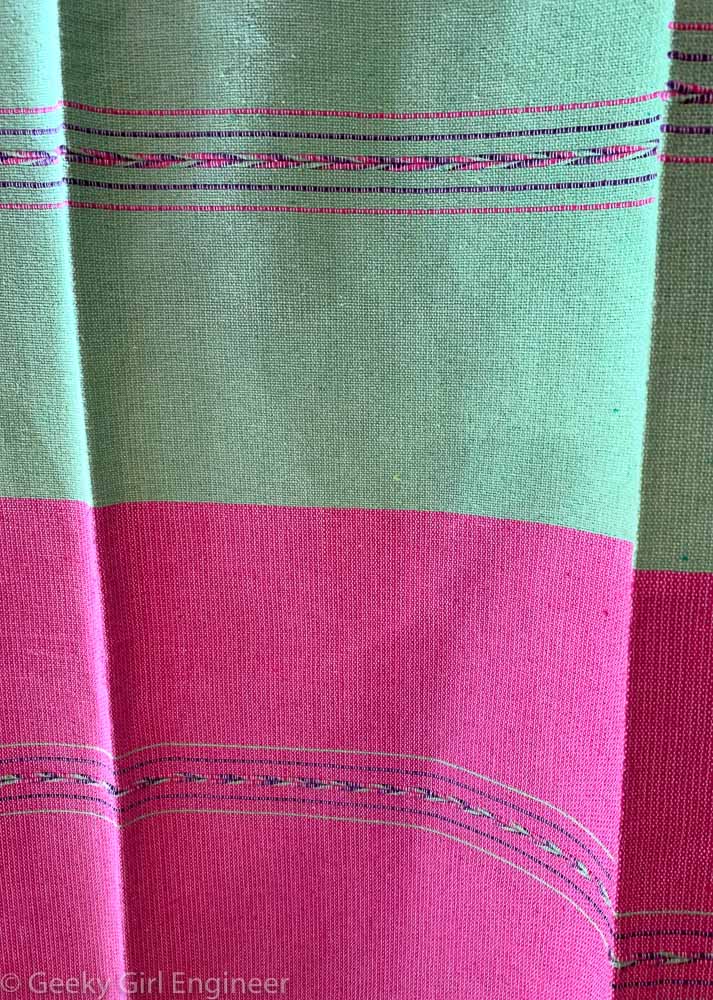
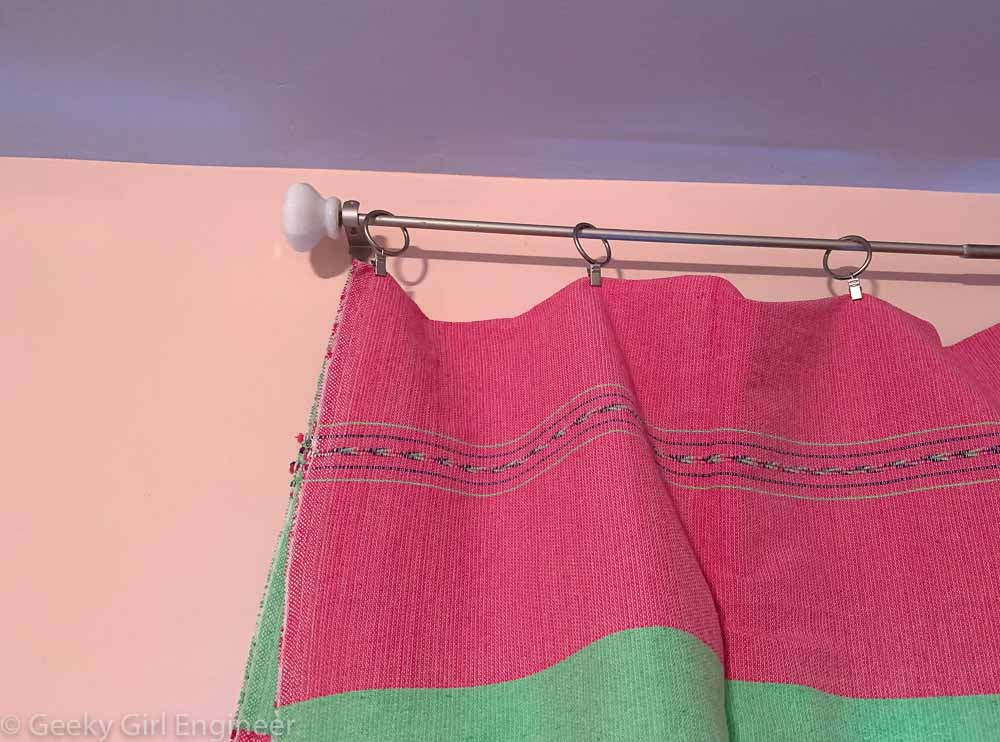
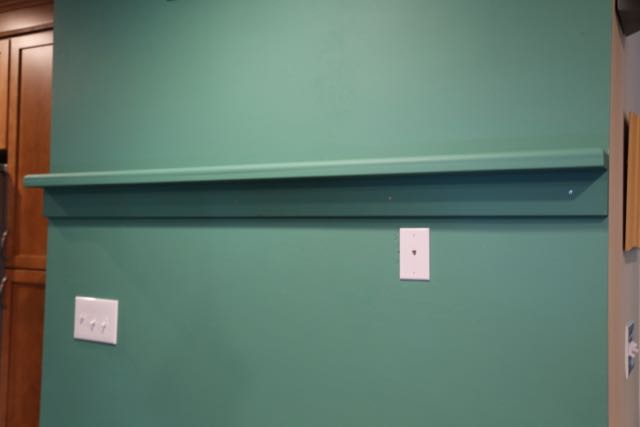
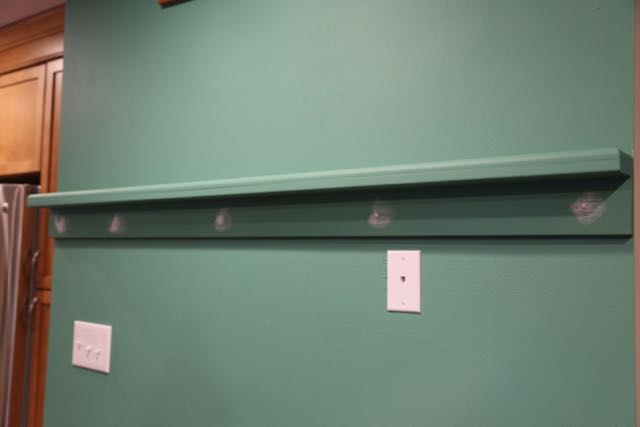
Last year I bought a tablecloth or blanket in Mexico that I love. I wasn’t sure what to do with it though. I finally decided it would make a perfect new window treatment for my window. I hung it up to replace the other textile. It was perfect for privacy and size. Now the problem became that it was a bit too heavy and causing the dowel to sag a bit too much. So, I bought a cheap curtain rod that would provide more strength and not sag from the weight. I removed the rod’s plain ends and glued the antique glass doorknobs to it. Now I once again have my glass doorknobs and a unique curtain to go with it.

With sunlight coming through
At night
The beautiful blanket stitching
Glass doorknobs are back up

Brooklyn Navy Yard

As part of Open House New York, I got to wander around the Brooklyn Navy Yard. The old navy shipyard is being redeveloped for commercial use. There are several dry docks, and one dry dock is still operational. There is also many green features includes renewable power. However, the site is quite simply a really cool place to photograph.

Between Buildings 30 and 58

Between Buildings 30 and 58

Dry dock that is no longer in use

Dry dock that is no longer in use

Building 128

Building 128

Building 25

Building 25

Building 20

Building 20

External staircase on Building 127

External staircase on Building 127

Crane for operation dry dock

Crane for operation dry dock

Operational dry dock next to the East River

Operational dry dock next to the East River

Old crane

Old crane

Tank next to Building 41

Tank next to Building 41

Building 58

Building 58

Renovated Bluiding 92

Renovated Bluiding 92

Building a Spice Rack

old spice rack

old spice rack

Here is the back story. The above photo is a spice rack I bought at IKEA. It was raw wood, and I painted it to match the wall. My initial intention was to see if I liked it there, then buy two more to place on either side if I did. I decided I did like it, but when I went to go buy two more, I couldn’t find them anymore. Then I realized, well this is stupid, I can just build a spice rack. Thus without further ado, how I built a spice rack.

The building supplies consisted of two primed, composite wood 1 x 4’s (which are really 0.75″ x 3.5″), primed 0.25″ x 0.75″ shoe molding, flat head screws, and wood glue. I cut the wood planks to fit the length of the wall, and I cut the molding into three pieces, one, the length of the planks and two, the length of the depth of the planks. Then I mitered the molding. The molding will serve as a shelf stop to make sure nothing falls off the shelf, in theory at least.

Building supplies

Building supplies

First, I joined the two planks to form an “L” shape.

Two planks joined

Two planks joined

I used screws to attach them together. Before inserting the screws, I pre-drilled holes and also pre-drilled a larger hole the size of the screw head at the very top of where the screw would go, so that the screw head would be recessed into the wood. The side where the screw head is, will be the top of the shelf, and plank perpendicular to it will be the way I attach it to the wall.

Screws used to join two planks

Screws used to join two planks

Then, I glued the long piece of shoe molding to the top of the plank, on the opposite side of the perpendicular plank.

Long stop piece glues and tape so it won't move while glue dries

Long stop piece glued and taped so it won’t move while glue dries

I then glued the two small pieces of shoe molding to the ends of the planks to complete the shelf stops. I used painter’s tape to keep the molding in place while the glue dried.

Tape pieces so they don't move while glue dries

Tape pieces so they don’t move while glue dries

Tape pieces so they don't move while glue dries

All pieces now joined, tape pieces so they don’t move while glue dries

Once the glue dried, I then used spackle to fill in the gaps and also the indentions where the screw heads are to make the shelf look more like one finished piece.

Sparkle used to fill in holes and gaps

Sparkle used to fill in holes and gaps

Spackle used to fill in holes and gaps

Spackle used to fill in holes and gaps

I then painted the entire piece with the same paint that I used to paint the wall. Obviously it could be a different color, but I like how it seems to just be part of the wall when it is the same color and not some attention grabbing piece. I then hung it on the wall using more flat head screws that I screwed into the studs.

Completed rack hung on wall

Completed rack hung on wall, notice recessed screw heads

Completed rack hung on wall

Completed rack hung on wall

I then filled in the volumes above the recessed screw heads with spackle.

Spackle used to fill indention from screw heads

Spackle used to fill indention from screw heads

Finally, I sanded the spackled areas and painted. Below, my finished, custom built spice rack.

Finished rack

Finished spice rack

Half Bathroom Renovation Finished

I have finished renovating the half bathroom! It is pretty much the last room in the house that needed renovation. [I say pretty much because I still have a few projects I want to do in the laundry area and storage room.] The plumber installed a new toilet and also the vanity. I bought a vanity that came with a white glass countertop, a white ceramic vessel sink, and a matching mirror. All it needed was the faucet. I installed a new three-bulb vanity light and also replaced the outlet and wall switches for new white ones. I also installed two glass shelves above the toilet. Finally I replaced the door hinges and door knob with hinges and a lever that match the rest of the house.

Full view of half bathroom

Full view of half bathroom

New toilet

New toilet

New vanity and matching mirror

New vanity and matching mirror

New vanity with vessel sink

New vanity with vessel sink

New glass shelves, mirror, and vanity light

New glass shelves, mirror, and vanity light

Half Bathroom Reconstruction

Reconstruction of the half bathroom is partially done. I hired a contractor to remove the second layer of subfloor and then lay concrete backer board so that I could lay tile. The contractor also placed new green board in to fill the whole from the old medicine cabinet and also use drywall mud on the walls to smooth over the texture left from the old wallpaper. After the contractor finished, I primed and painted the walls and ceiling and laid a new tile floor. I painted the walls the same blue color as the accent wall in the dining room, and the ceiling is the same pale blue as the ceiling in most of the house.

Patched and smoothed walls

Patched and smoothed walls

New concrete backer board subfloor

New concrete backer board subfloor

Newly painted walls and ceiling

Newly painted walls and ceiling

New tile floor

New tile floor

New marble transition and new tile floor

New marble transition and new tile floor

Half Bathroom Deconstruction

Sadly, with this phase of renovation, there was no drywall demolition. I say sadly because drywall demolition is one of my favorite activities. Deconstruction is now finished. The plumber came in first and removed the toilet and disconnected the sink. I removed the wallpaper, tile floors, the vanity, and all the fixtures. I then had a contractor come in and remove the second layer of plywood subfloor which only went around the old vanity. As with previous rooms I have renovated, at some point, “renovators” came and removed the old floor, but only around the old vanity, then put in another layer of plywood subfloor for no discernible reason, and then tiled. Thus everything had to come out to get to the original subfloor.

Old tile floor

Old tile floor

Old tile under the vanity still present

Old tile under the vanity still present

Demolition (almost) complete

Demolition (almost) complete

Hole left from medicine cabinet

Hole left from medicine cabinet

Vanity removed

Vanity removed and tile removed

Phase 4 Home Renovation Begins

The (possibly) final home renovation phase has begun. This will be a rather small and hopefully short phase. The only room involved is the half bathroom off of the living room and kitchen. So first some photos of the bathroom before renovation. The vanity cabinet is the exact same style and color as the old kitchen cabinets were. I did not realize it until I took it out, but the mirror above the vanity was actually a medicine cabinet.

Looking into the bathroom from the living room

Looking into the bathroom from the living room

The old vanity and medicine cabinet

The old vanity and medicine cabinet

Old vanity

Old vanity

Looking out to the living room

Looking out to the living room

Burlington Houses

While I spent much of my time walking around Burlington, Vermont, in the downtown area, I also spent a good deal of time walking around some of the residential neighborhoods. Burlington has some historic, large, gorgeous houses, and many of them are painted in various, traditional colorful schemes. However, Burlington also has plenty of not quite as old, not quite as nice houses painted in not quite so traditional colors. Some of them are painted in almost blindingly bright color schemes, and I loved them. They are not traditional at all, but in my opinion, they are completely fun. I don’t even like some of the color schemes, but I love that someone cares enough about the house and what it looks like to paint it something other than all white.

The day that I spent much of my time photographing these houses, I walked into the Fletcher Free Library. While I was admiring the architecture of the old section of the building, Lorrie, one of the library workers asked me if I was enjoying the architecture. We had a lovely conversation about the library, Burlington, and Burlington’s houses. It turns out she knows the owner of many of the colorful houses that I was admiring. You have to love small towns, because of course I would run into someone who knows the owner of many of the houses. According to her, Stu lives in the brick house with purple trim that is situated between the two purple-painted wooden houses, and he has the purple Camino. These were some of the houses that I was admiring the most, especially since they featured the color coordinated purple car in-between them. Also, his brick house has a duck family walking on the ceiling of the entry porch because of course it does. He and his wife own and rent many of the bright houses, and he paints them that way just because he likes it and doesn’t care what others think. Stu, I am an admirer of your work. I don’t like all the color schemes, but I love that you painted them that way.

Post has been edited to correct the spelling of Lorrie’s name. Thank you Stu for the correction, and thank you for your comment!

lavender houseblue and orange house blue duplex brick and purple trim

purple house and camino

clay color house fancy blue house fancy cream hosue green and creme hosue lime green store orange and purple houses pink and red house primary color apartments purple and blue houses sage green house sunset trim wood and metal house yellow houseWell played Benjamin Moore, well played.

Benjamin Moore

Master Bathroom Renovation Is Finished!

The master bathroom renovation is finally completely finished. The bathroom is small, but it has all the features I need and want. It is functional, and I love it. I previously wrote about the cabinets, but the final piece, an open shelving unit that sits on top of the countertop has been installed. All the cabinetry is from Tuscan Hills, and while most of it is standard cabinetry, some of it, especially the false bottom of the wall cabinet for access to the bath mechanics is custom. The tub is an MTI Andrea 14, and I must admit, after having taken a bath in it, it is even bigger than I realized, but it has whirlpool jets and air bubblers and is quite lovely in which to soak. I used frameless glass for the shower and simple, clear glass vessel sinks, so that visually they take up as little space as possible. I previously wrote and posted more detailed photos of the shower, so I am not posting too many here. The plumbing fixtures are all Grohe’s Atrio line. I used Moen’s Iso line for the towel bars and rings, robe hooks, and toilet paper holder, and I used Thomas Lighting’s Pittman fixtures for the vanity lights and wall sconces in the water closet.

Newly renovated master bathroom

Newly renovated master bathroom

Shower

Shower

Tub

Tub

Wall cabinet next to the tub

Wall cabinet next to the tub

Water closet

Water closet

Vanity

Vanity

Vanity

Vanity

Open shelves on the vanity

Open shelves on the vanity

One of the sink areas

One of the sink areas

Vanity faucet

Vanity faucet

Vanity lights

Vanity lights

Vanity Backsplash Tiled

This weekend I tiled the vanity backsplash. It is a rather high backsplash as I wanted the tile to go at least as high as the wall faucets. I wanted to tile a border around the recessed medicine cabinets, so I decided just to bring the backsplash up to the base of the medicine cabinets. Also, I changed the original design for tiling in the shower, and I have a bunch of left over glass tile, so I might as well use it. The height of the marble tile was determined by the height of the electrical box because I wanted the same tile type surrounding the electrical box, so the cover would lay flat.

Tile frame for medicine cabinets

Tile frame for medicine cabinets

Tiled vanity

Tiled vanity

Tiled vanity. Tiling stops before corner where shelving unit will be.

Tiled vanity. Tiling stops before corner where shelving unit will be.