Mardi Gras Door Decoration

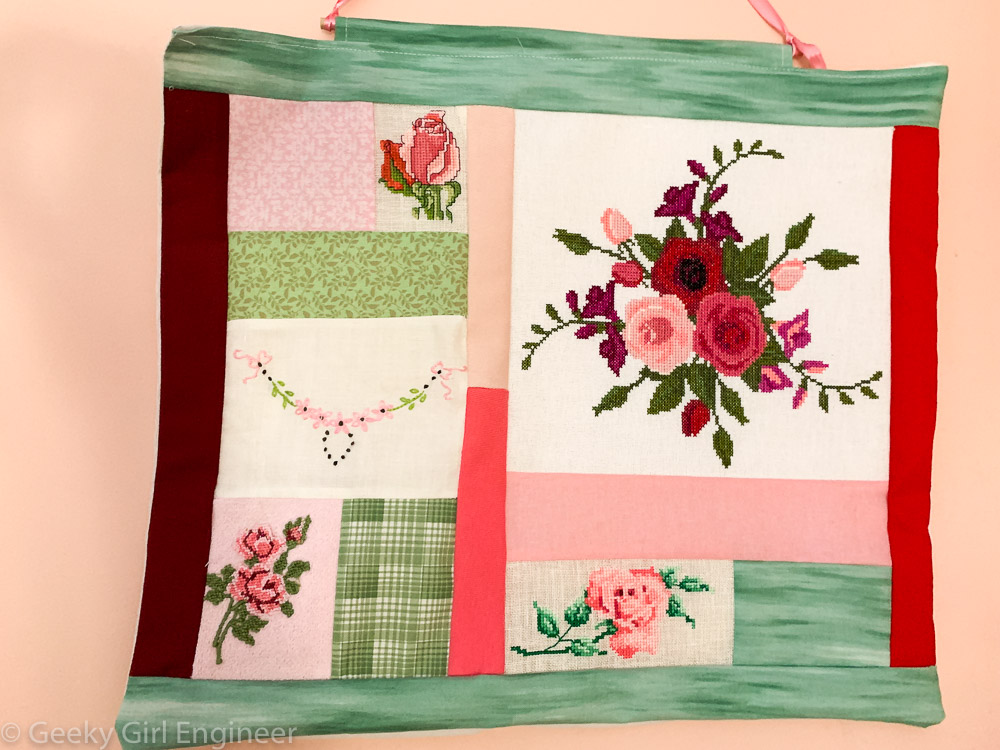
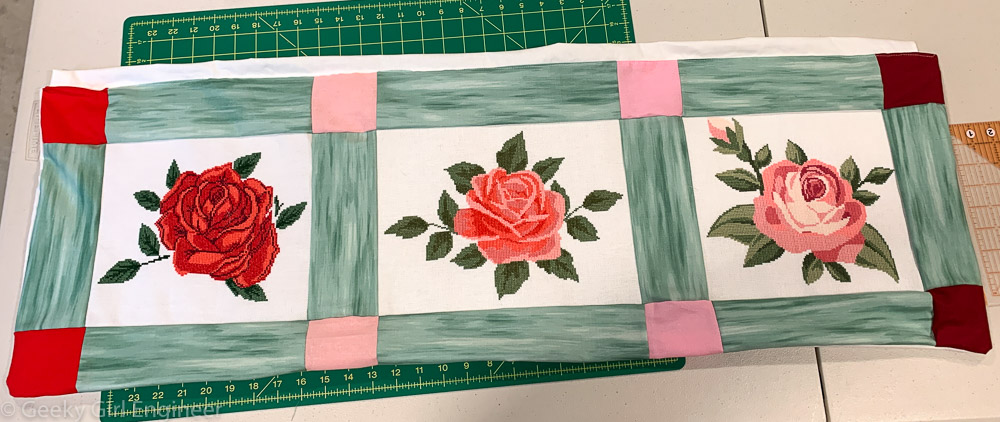
I’ve made several Mardi Gras table runners just by sewing simple strips, and I also made one table runner using a pattern I bought. Then I had some leftover fabric pieces as well as some fabric I really loved and wanted to use for something special. Also, I had found a really nice fleur de lis cross-stitch pattern while I was in New Orleans, and I wanted to use the cross-stitch for something special. So what to do? I decided to make a quilted piece to hang on my front door. Luckily, my front door is actually a set of double doors because my Mardi Gras wreath is hanging on the other door.

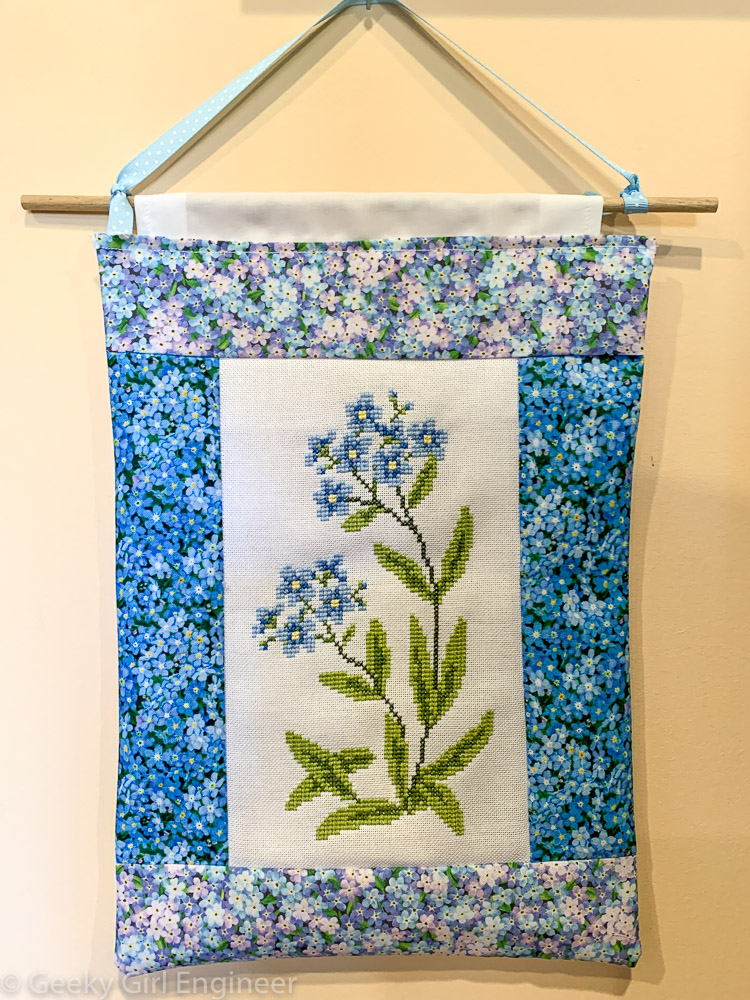
Finished piece hanging on my front door

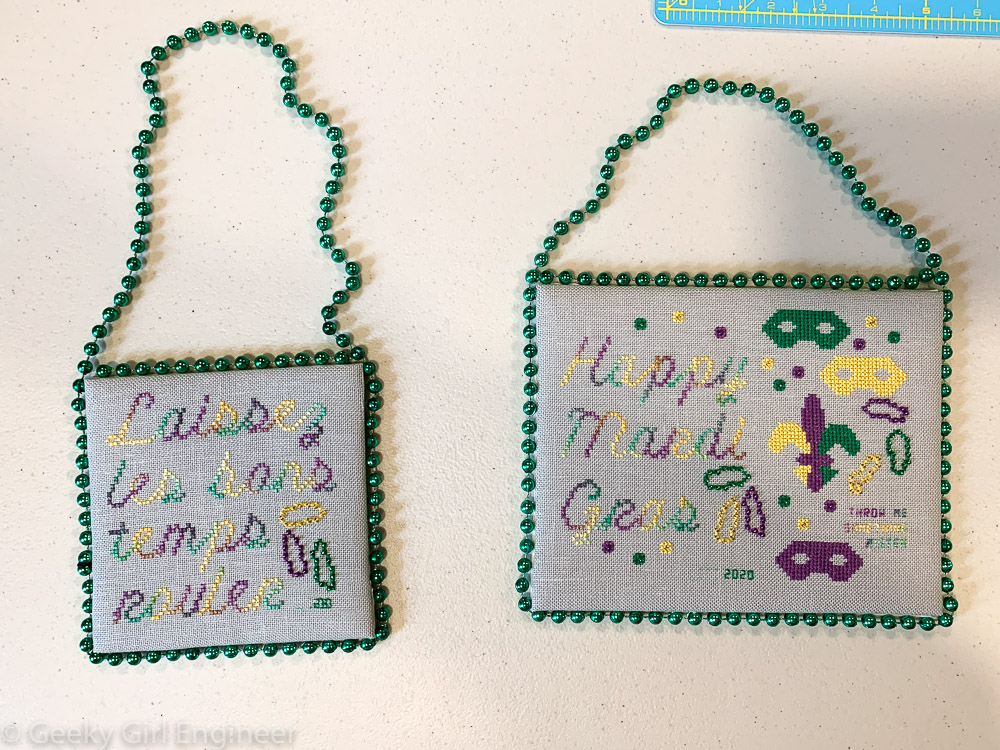
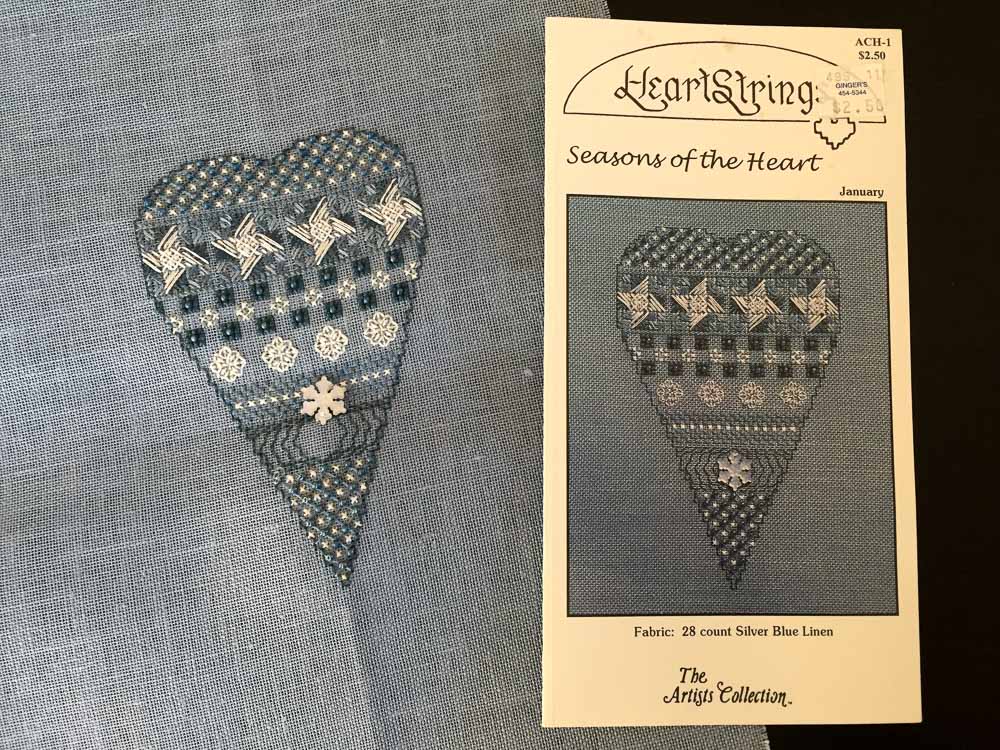
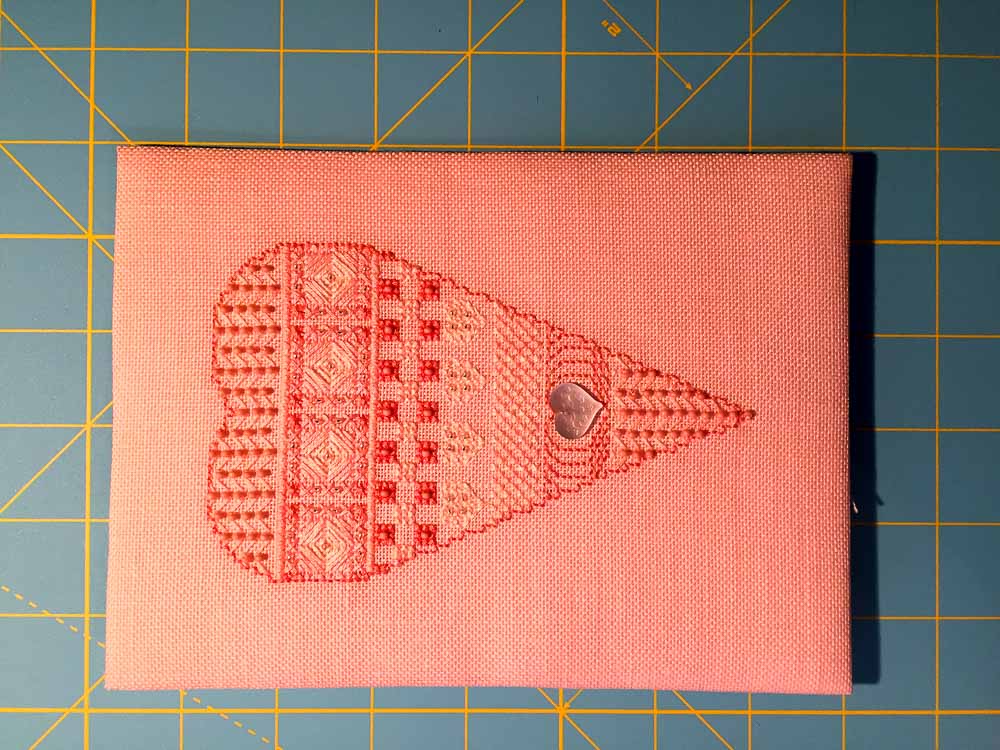
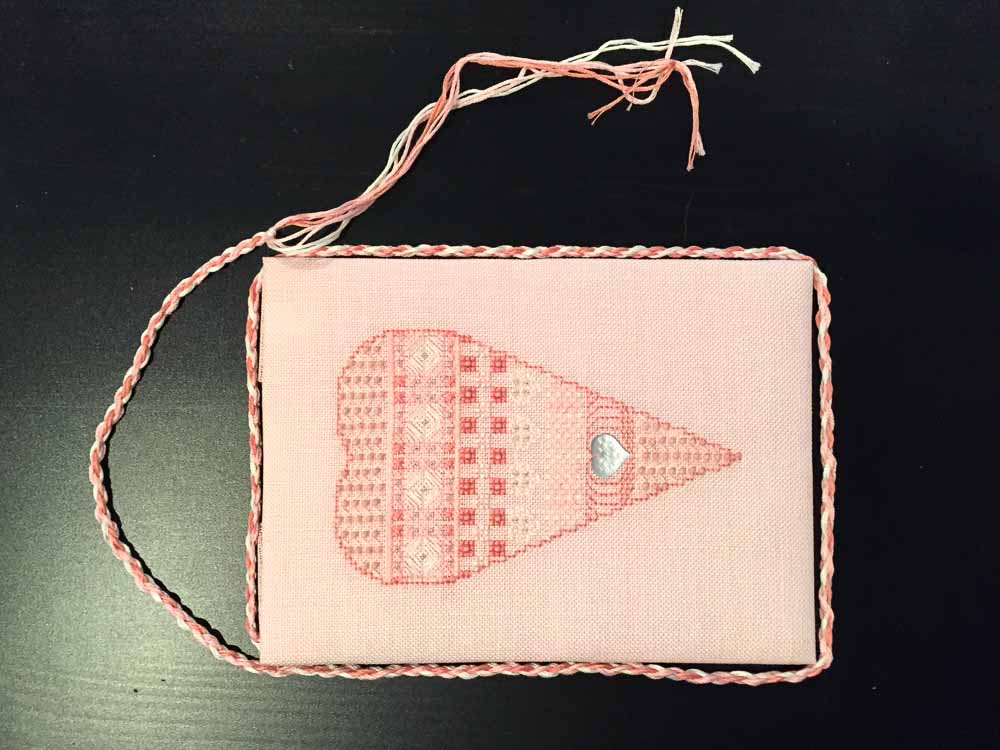
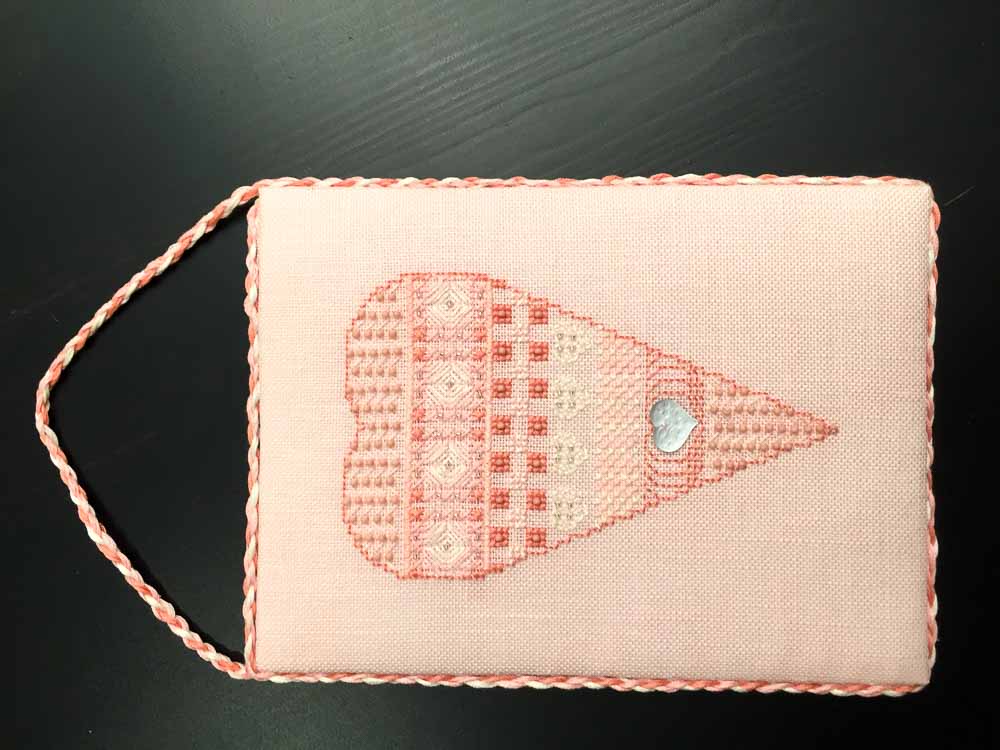
The centerpiece of the piece is the cross-stitch for which I used Mardi Gras colors. This was a perfect place to display the cross-stitch.

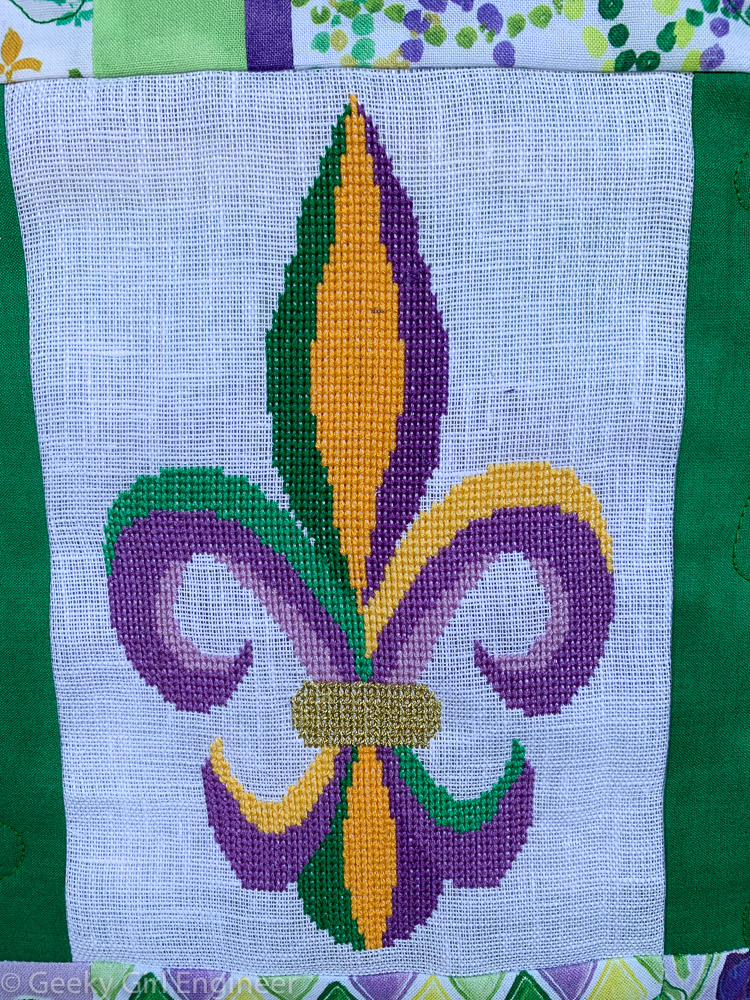
Fleur de lis cross-stitch in Mardi Gras colors

Since I don’t live in New Orleans, I decided perhaps I need to make it completely clear what my decorations are for, so on the absolutely wonderful fabric by Dear Stella that I just love, I machine embroidered “Happy Mardi Gras.” I love the beads on a fence design, and with just a little work to get the spacing right, the white space allowed me to embroider the greeting.

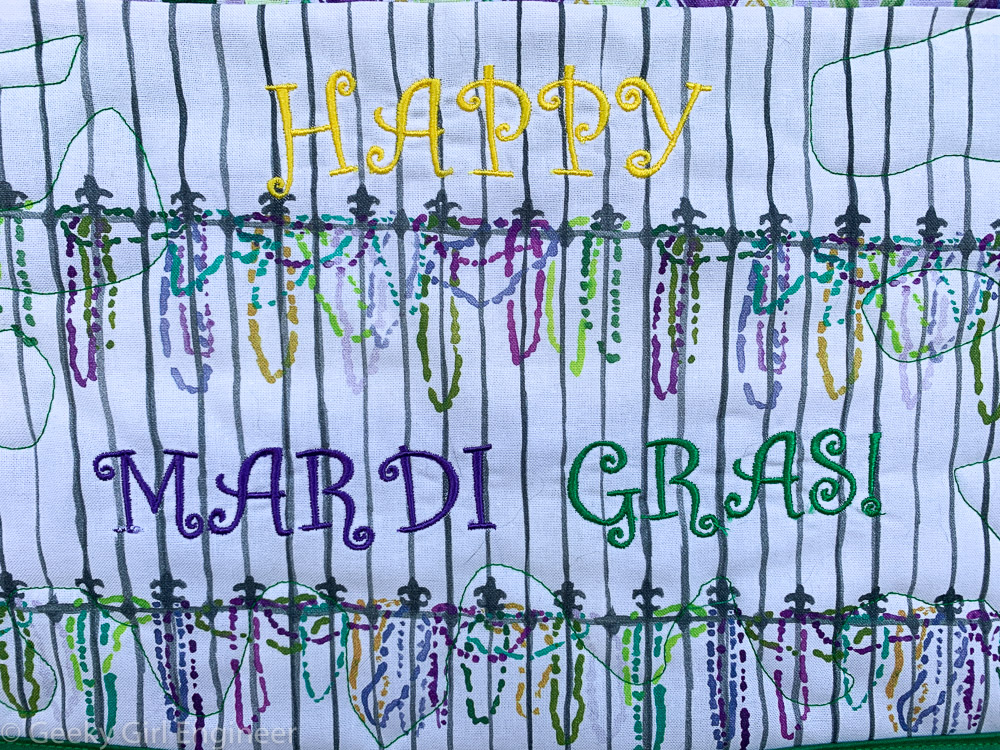
Mardi Gras fabric with “Happy Mardi Gras” machine embroidered on it

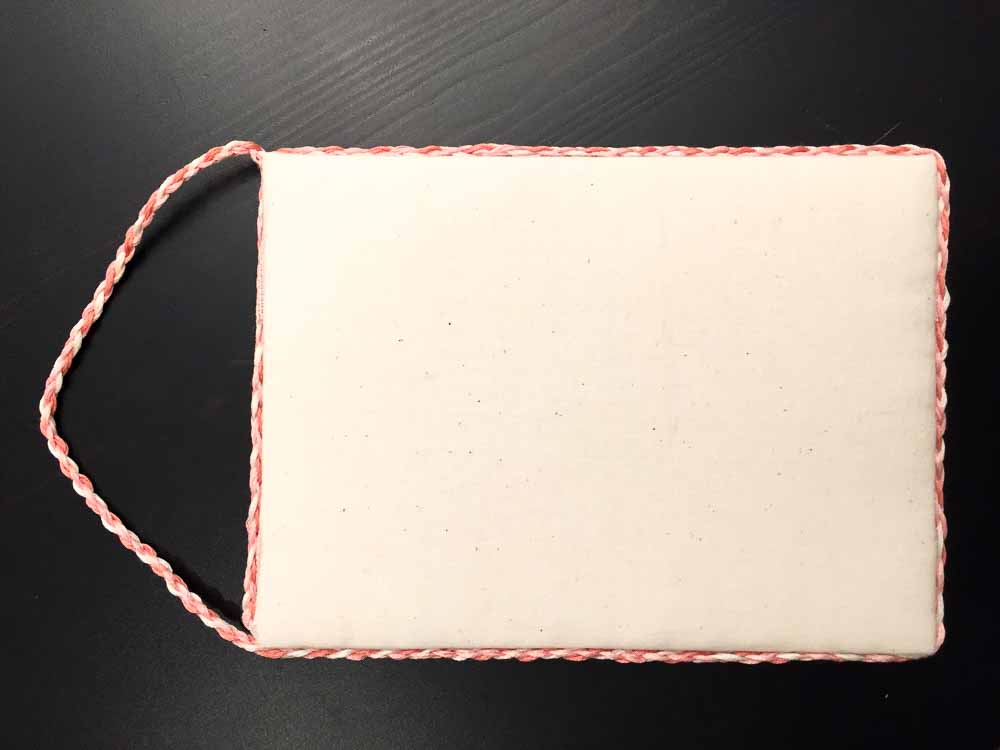
Then I just used left over fabric from the table runners to complete the piece. This included the back, which is entirely composed of leftover fabric stitched together.

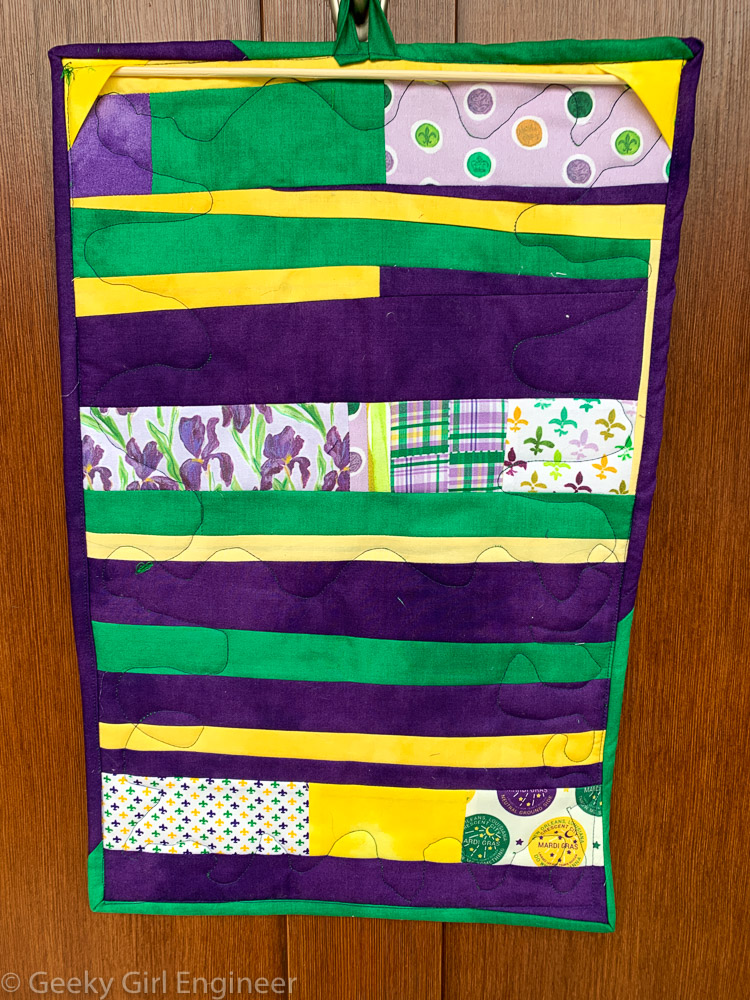
Back of Mardi Gras door decoration composed of leftover fabric

Mardi Gras Cross-Stitch

I made these last year, and I evidently forgot to post photos of them. I found some wonderful cross-stitch thread named appropriately Mardi Gras. The words are based on a font pattern that I found online. The rest of it is original. I drew a fleur di lis and masks on a grid and then created a cross-stitch pattern out of them. It is probably difficult to see in the photos, but for the stitched beaded necklaces, like Mardi Gras throws, I used seed beads to make them really look like beads. The one that says Happy Mardi Gras was originally the only one I was planning to make, but I had a bunch of the thread left over, and I really liked it, so I made another piece just to use the thread. I created a patted mat board with the finished pieces. I then hung them with Mardi Gras beads that I glued around the pieces. I love to decorate for Mardi Gras. It is just so much fun.

Cross-stitch pieces on padded mat board hung by Mardi Gras pieces

Two Mardi Gras cross-stitch pieces

Cross-stitch that says Happy Mardi Gras

Happy Mardi Gras cross-stitch

Cross stitch that says Laissez les bons temps rouler

Laissez les bons temps rouler cross-stitch

Patchwork wall hanging

After I made the wall hanging with the three cross-stitched roses, I wanted to experiment a bit and make another wall hanging with a variety of fabrics. The main purpose of the wall hanging was to find a way to display a large cross-stitch with flowers (upper right). I had two other small cross-stitch flowers that I added to the wall hanging. These are the rose bud in the upper left and the rose in lower center. I used it as an opportunity to patch together a couple of different types of fabrics. The lower left corner rose is an appliqué that is on a cotton towel that I cut. The flower garland embroidery pattern piece from a linen towel. The two vertical center solid pink pieces are from old clothing. The top pale pink is from denim jeans, and the lower bright pink is from a cotton shirt. The rest of the fabric is quilt weight cotton fabric. The different fabrics made it a bit more difficult to sew and square things, but it was a learning opportunity.

Patchwork wall hanging with several fabrics and no set pattern

Wall hanging with three cross-stitch projects and a patchwork of fabrics

Cross-stitched roses wall hanging

During COVID, I have been doing a lot of cross-stitching. Then of course, the question is what to do with all these finished cross-stitched projects. Wall hangings are rather easy and give me a way to display them. I found patterns for three lovely roses on Etsy by the same artist, so I decided to finish them as one wall hanging. I used coordinating green fabric to frame each with four different colors of reds and pinks to emphasize the colors of each rose.

This wall hanging also gave me practice sewing. If you look carefully, you can tell, I still need practice sewing. [Although I have done a lot of sewing since I made this months ago.] My main issue is getting pieces to meet and square properly. I think part of the problem, at least for the below project, is that the framing fabric is standard cotton fabric, perfect for quilting. The cross-stitches are obviously done on a different type fo fabric. These are on linen. The fabrics stretch slightly different, and I think that is leading to some problems. Clearly I just need to keep stitching and sewing and practicing more.

Fabric wall hanging with three cross-stitched roses framed in fabric

Finished project of three roses wall hanging

Cross-stitched rose

Up close view of middle rose

Cross-stitched rose

Up close view of left rose

Cross-stitched rose

Up close view of right rose

Framing a cross-stitch with fabric

With the exception of my really big cross-stitch projects, I don’t frame them. Very often I finish them by putting them on a patted mat board that I then finish with a ribbon to hang them. I really like doing this in particular for holiday and seasonal cross-stitch projects as it makes it easier to take them down and store them until I want to hang them again.

While I was in Alaska on vacation this summer, I bought some wonderful cross-stitch patterns designed by an artist there of Alaska flowers. One pattern was fireweed, and another pattern was forget-me-nots. I loved stitching patterns that represent and remind me of a place I have visited, in this case Alaska. While there, I also found some wonderful fabrics that also showcase Alaska. Fortuitously, I found some fabric printed with fireweed and forget-me-nots, so I used those fabrics to frame the cross-stitch projects.

I just sewed some simple blocks to frame the cross-stitch patterns. I then sewed a back sort of like I was making a pillow. I just didn’t put a pillow in between the front and back. I then sewed a sleeve to the top, put a wooden dowel through the sleeve, and tied a ribbon to hang it.

Fireweed cross-stitch framed with fireweed fabric

Forget-me-not cross-stitch framed with forget-me-not fabric

My Newest Hobby

I am the type of person who always has to be doing something. It is not exactly that I can’t keep still. It is more that I feel like I always have to be productive. I grant you there are different definitions of what is and is not productive. I generally can’t just watch television. I need to have my hands doing something. [OK maybe I can’t keep still.] That could be something mindless on the computer, but most of the time, I cross-stitch while watching television. I can sit and relax and watch television, but I am still productive as I cross-stitch. Especially since the COVID-19 pandemic, I have gotten a lot of cross-stitching done because I don’t leave the house near as much as previously. Thus, in the past two years, I have finished many wall-hanging and other types of cross-stitching, both the actual stitching and the display method.

Because of the way I wanted to display many of the cross-stitch projects, I started to sew more. That has morphed into sewing becoming a new hobby. I’ve sewn before. I bought my first sewing machine at least twenty years ago. However, my sewing was generally simple straight stitch to make something basic. Most of my sewing is still very basic, but I am starting to do more complex and involved sewing like quilting. I am starting to imagine things I would like to sew now including wall hangings, blankets, table runners, and more. Something I like about sewing is that I can make something useful. Sewing can result in pretty if not exactly functional products, and you can argue about if a wall hanging is functional. Blankets are definitely useful. Table runners are too in my opinion.

I am not saying that all hobbies have to generate something functional. I just tend to gravitate towards those types of hobbies. Part of the reason may be because I really like making things, and then I need to figure out what to do with all these things I have now made. Twenty years ago when I lived in Austin, I started taking pottery lessons. I started with classes using slabs to make things and also extruded clay. I then moved onto throwing pottery on the wheel. I loved it. However I kept making things that I didn’t exactly know what to do with. I made lots and lots of bowls. I learned how to put a rim at the bottom of my steady stream of bowls, so I could make planters. I have many planters, bowls, and other items I made. For a while, family and friends were pretty much guaranteed pottery as a present from me because I couldn’t keep everything I made, nor did I want to keep them. Don’t get me wrong, I loved giving my pottery as presents, and I think most family and friends liked receiving it. It was more a matter of I made another bowl, now what do I do with it?

One of the reasons I love digital photography is that it only takes up electronic storage space. I can print the ones I want, hang them on a wall, and remind myself of the beautiful places I have been. I can keep the rest though and not clutter up my house. While I was working on my Ph.D., I started making things with beads, mainly jewelry. The problem with beading is, you have to buy a whole lot of beads to make one bracelet. I don’t make things with beads that much anymore, but I still have the beads. I can’t quite figure out what to do with them all. I could make jewelry and try to sell it, but lots of people make jewelry, so setting up a tiny, side business is generally more hassle than it is worth. However, I am now getting ideas of how to incorporate beads into sewing projects. These sewing project would not be washable of course.

So now, I am really into sewing, verging on addiction. I have found my new creative outlet. I may try to take some classes. I have already watched way too many videos on YouTube. I bought a new, very fancy, very expensive sewing machine several months ago. [Really it is more a computer that sews.] The people at the store where I bought have been very helpful with tips and information. Thank goodness for people who like to share their knowledge. I have already bought too much fabric, so I need to keep sewing to do things with the fabric.

I will be posting in the coming weeks and months more of my projects, cross-stitching, sewing, etc. I realized there is some stuff that I made that I never shared on this blog. Probably because I was too busy moving onto the next project. So stay tuned.

Cross Stitch Hanging Padded Board

After my blog post asking for help as to how to finish a cross stitch in a manner that mimics one I had professionally finished years ago, I received some good suggestions of how I should and should not do it. After a bit more experimenting, I have now finished two cross stitch works that I did years ago, so now I am posting how I did it.

Let me start with why I did not just have a professional do it. First, I figured I could do it myself. Second, I found a local stitching shop to inquire about having some stitching work I had done finished. They said that to do what I wanted done would be about $75. This is probably not an unreasonable cost, but I have twelve that need to be finished, and that would have cost a lot of money. Years ago, I took a stitching class, and we did one for every month of the year.

Cross stitch samplers with each one themed per month

Here is a closer look at the January one.

January’s heart with the pattern that was used

I wanted the pieces finished on a padded mat board that could be hung using cording of some type. I used the Halloween one that I had professionally finished as a model for making decisions on the hearts. Unlike the Halloween one, I decided just to use a plain, off-white muslin as the backing for all the hearts. The back won’t normally be seen, so I decided just to go with something simple and buy one big thing of cloth that I could cut into pieces for all the heart backs. Next, examining the Halloween one, it looks like they used DMC pearl thread for the cord border. The problem with pearl thread, is that it does not come in that many colors, and I wanted to use cording that matched the pieces. I decided to just use the floss that was used for the pieces themselves, and I will show how I did that below.

I decided to make the pieces one inch wider on each side than the stitching. This worked out to a piece that is 5.5 inches wide and 7.5 inches high. To start, I bought framing mat board, and I cut two pieces that were each this size, one piece per side of the finished piece.

I used an xacto knife to cut the mat board.

Next, I used low loft batting for quilting, and I cut two pieces at this same size. I did not use fusible batting, and this became a good thing later.

Low loft quilt batting

Next, I cut a piece of the muslin. I cut the piece about an inch larger on each side than the finished piece, so two inches wider and two inches higher than the finished piece.

Plain, off-white muslin from the fabric store

I started with the back piece. Very importantly, I ironed both the batting and the fabric first. This is one of the reasons it worked out well that I did not use fusible batting. I laid the cut muslin down, then centered the batting on top of it, then I laid the mat board on top of it. After the first piece I quickly realized, it is much easier to first glue the batting to the board, then to center the batting/mat board on the fabric and then to attach the fabric. I used a plain glue stick for this. I used glue that did not contain acid.

Muslin, then batting, then board centered
Matting sandwiched between the muslin and mat board

Then, I stretched the fabric and pulled it around the back. I then glued it to the back of the board.

Fabric was pulled taunt then folded over the back of the board then glued

Next, I moved to the cross stitched side. I again ironed the cross stitch fabric and the batting piece. I cut just a little bit of the excess fabric, but I left as much as possible in place. I then laid it face down, measured an inch from the farthest edges of stitches, and made tiny little tic marks to help me center the batting and mat board.

I centered my measuring tool then made tic marks on the back one inch from the edges to guide placement of the board.

As I said above, I found it worked better to first glue the batting to the mat board. I then centered that on the back of the stitched fabric using the tic marks. Then I very carefully pulled the fabric evenly taunt and glued it to back of the board.

Stitching centered on the board with the top and bottom glued to the board
All sides glued to the back
Finished top piece after fabric is pulled and glued to the back

It does not look that good from the back, but this will be covered up. Something I realized after doing the first one, is to not glue the excess fabric from the folded over sides on the top of the piece. The reason is that this fabric makes a good anchor to attach the floss that I used for the cording to surround the sides and to hang the piece. I used thread to attach the floss to the fabric.

The floss is doubled and attached to the excess fabric at the top using thread.

I then braided the floss. I explained how I did that in another blog post. I braided enough floss until I had enough to cover the perimeter of the piece and then to make a hanger.

Checking the length of the braided floss

I then knotted the end of the braided floss and stitched it to the back of the excess fabric on the top side opposite where I attached the start of the fabric.

Then I finally glued the back piece covered with muslin to the front piece with the stitched fabric. I used a glue stick to glue them back to back. Then I used thread to stitch the top of the of the two pieces of fabric together to close the gap formed because of the matting and the boards. At the same time while stitching them together I also ran the thread through the braided floss to attach that. I used a slip stitch of sorts to make the thread as invisible as possible.

Two sides glued together and using thread to bring fabric edges together with braided floss

The excess braided floss was then used as the hanger for the piece. Finally the finished piece looks thusly.

Front of the finished piece
Back of the finished piece

I think the most time was probably spent braiding the floss, but other than that, it was fairly easy. If you decide to do something similar, take your time, and as always, measure twice, cut once. Now I only have ten more to do.

Edited to add: I finished the entire set of twelve!