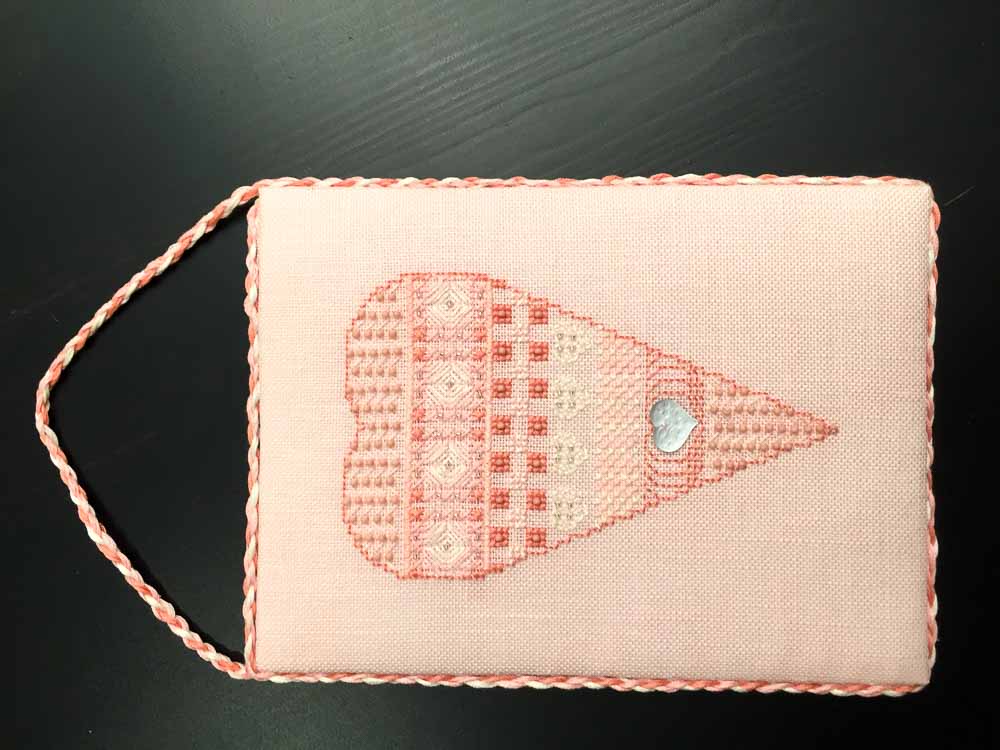
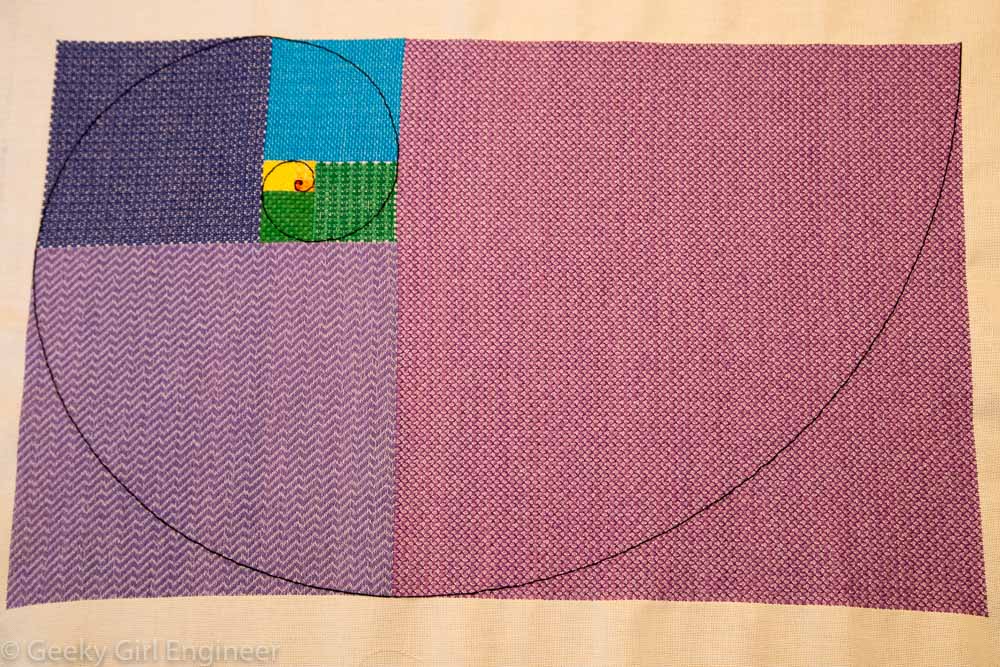
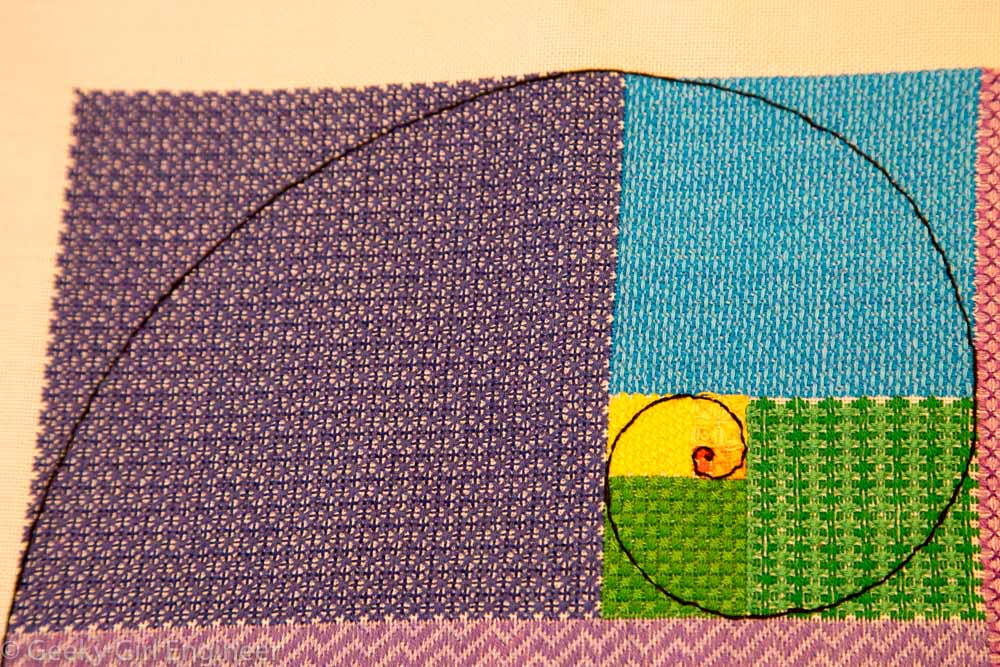
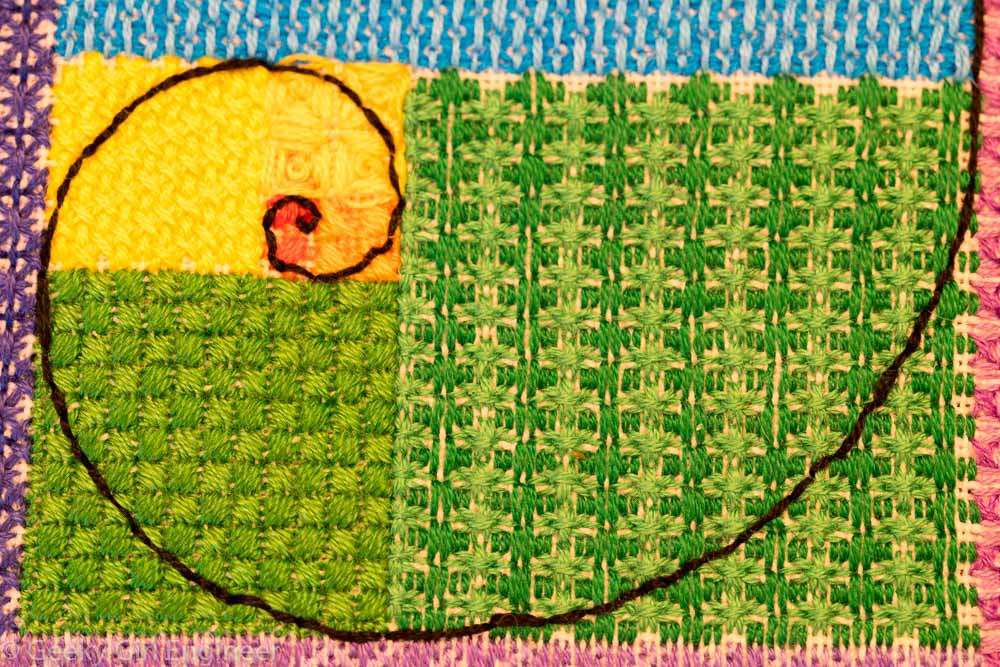
I finished my big COVID-19 stay at home project! I love and am fascinated by the Fironacci sequence, so I decided to stitch it. I love the way it came out. I used a different color and different stitch for each square. I calculated where each of the spiral stitches needed to go, rounding as close as possible. One nice thing about stitching on a grid, is that it makes it easy to figure out where the spiral goes. I used an evenweave linen fabric to ensure each stitch went over the same width of thread. For those who want the particulars, I used a 28 count evenweave stitched over 1. For those who really want more particulars, I have placed the design pattern I devised in a table below. The entire pattern is 377 by 610 squares, which is about 13.5 x 21.7 inches or 34.2 x 55.3 cm.
Below is a table of the pattern I used. Size is based on stitching over one on a 28-count linen. Colors are DMC. Stitches and their names are from “Stitches To Go” by Suzanne Howren and Beth Robertson.
| area | sequence | size (in) | stitch | color 1 | color 2 | color 3 |
| 0 | 0 | 0 | ||||
| 1 | 1 | 0.036 | diagonal (/) | 815 | ||
| 2 | 1 | 0.036 | diagonal (\) | 326 | ||
| 3 | 2 | 0.071 | cross stitch | 817 | ||
| 4 | 3 | 0.107 | 2 parallel lines | 349 | ||
| 5 | 5 | 0.179 | criss cross hungarian | 606 | 608 | |
| 6 | 8 | 0.286 | arrowhead | 740 | 741 | |
| 7 | 13 | 0.464 | shadow square | 743 | 744 | 745 |
| 8 | 21 | 0.750 | double stitch variation | 307 | 973 | |
| 9 | 34 | 1.214 | reversed scotch | 700 | 701 | |
| 10 | 55 | 1.964 | cameo | 909 | 911 | |
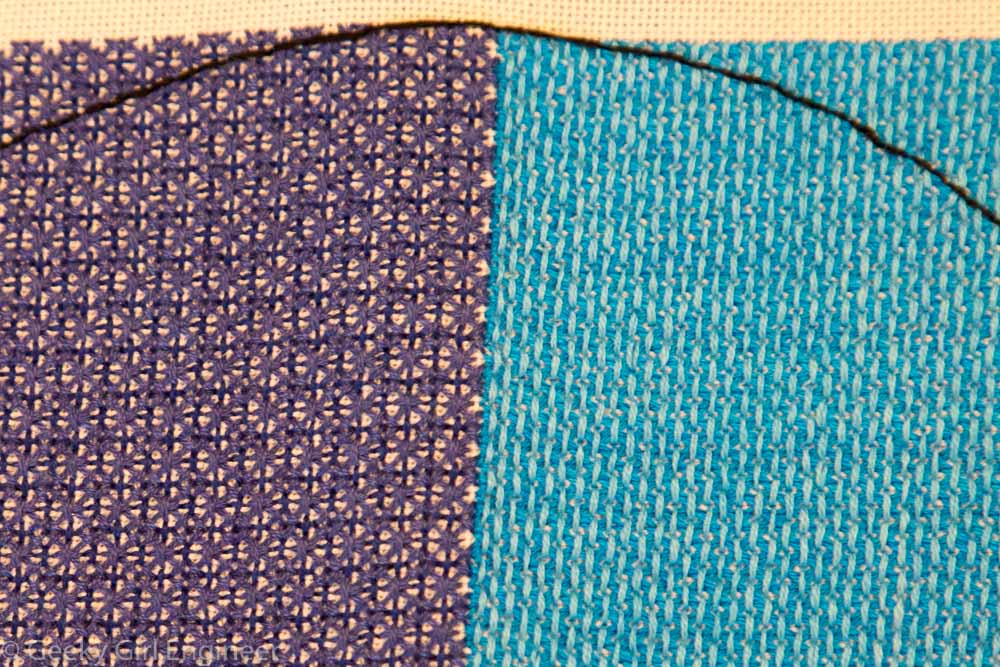
| 11 | 89 | 3.179 | dutch | 995 | 996 | |
| 12 | 144 | 5.143 | chinese rice | 796 | 797 | |
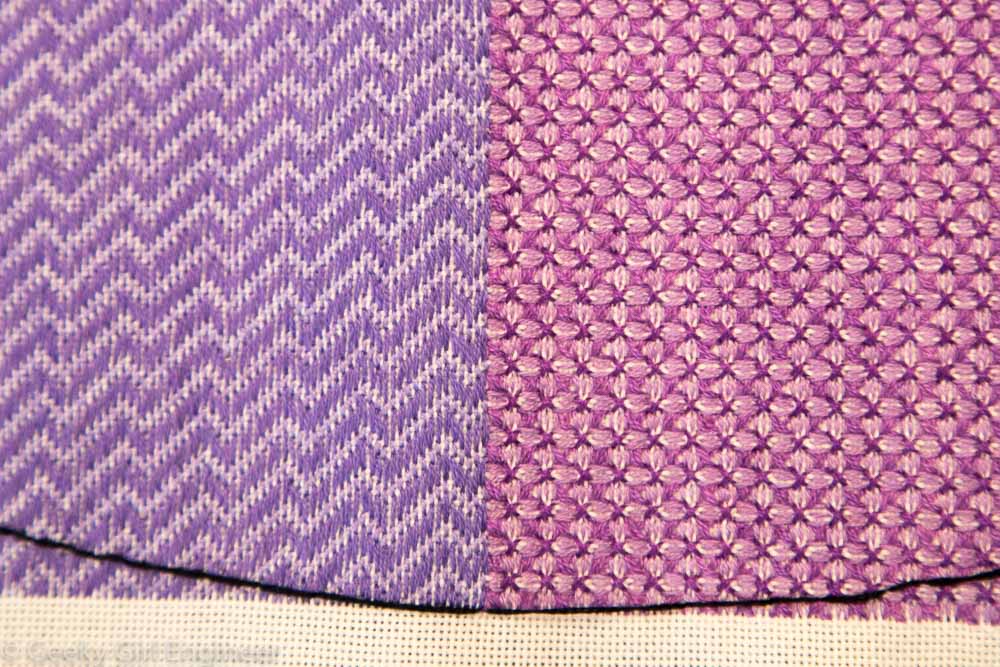
| 13 | 233 | 8.321 | lightning | 155 | 3746 | |
| 14 | 377 | 13.464 | floral | 208 | 209 | 3837 |